Getting back to pink in the 18th century, we did 1700-1709, now let’s look at the 1710s.
Rather than going from palest to darkest, like I did in the last post, I thought I’d start off with a bang.
And by bang, I mean Barbie pink. This post was written by Leimomi Oakes for thedreamstress.com. If it is published somewhere else it has been stolen.
Maria Clementina is absolutely 1710s Barbie in this amazing mantua. (side note, the women in this post really do have the best names).

Francesco Trevisani, Portrait of Maria Clementina Sobieska, 1719
I’ve never been a bright pink wearer myself, but if I ever found the correct fabric I would LOVE to recreate Marie Clemantina’s ensemble.
Then we have Three Princess: The Barbie Movie:

Portrait of Archduchess Maria Magdalena of Austria (1689-1743), daughter of Leopold I, Holy Roman Emperor by Johann Friedrich Ardin 1712

Portrait of Maria Anna of Austria (1683-1754), daughter of Leopold I, Holy Roman Emperor by Johann Friedrich Ardin, 1712

Presumed portrait of Archduchess Maria Elisabeth of Austria (1680-1741), daughter of Leopold I, Holy Roman Emperor by Johann Friedrich Ardin, 1712
The three portraits are miniatures, which can exaggerate colours, so just to confirm that colour appears in other settings, here’s a significantly more muted portrait, except, that is, for Hedwig’s lining:

Jan Kupecký, Portrait of Hedwig Franciska Wussin (detail), 1716
And why stick to just a lining when you could go for a whole dress?

Portrait of an unidentified woman, misidentified as Bayonne de Caupenne d’Amou Dame de Piis (1752-1830) Basque Museum in Bayone
Just in case you are wondering if the paintings are fiction, here’s some extant examples of that shade. Have an eyeful of these:

Waistcoat, 1733–34, probably French, silk, metallic thread, Metropolitan Museum of Art, 1991.220
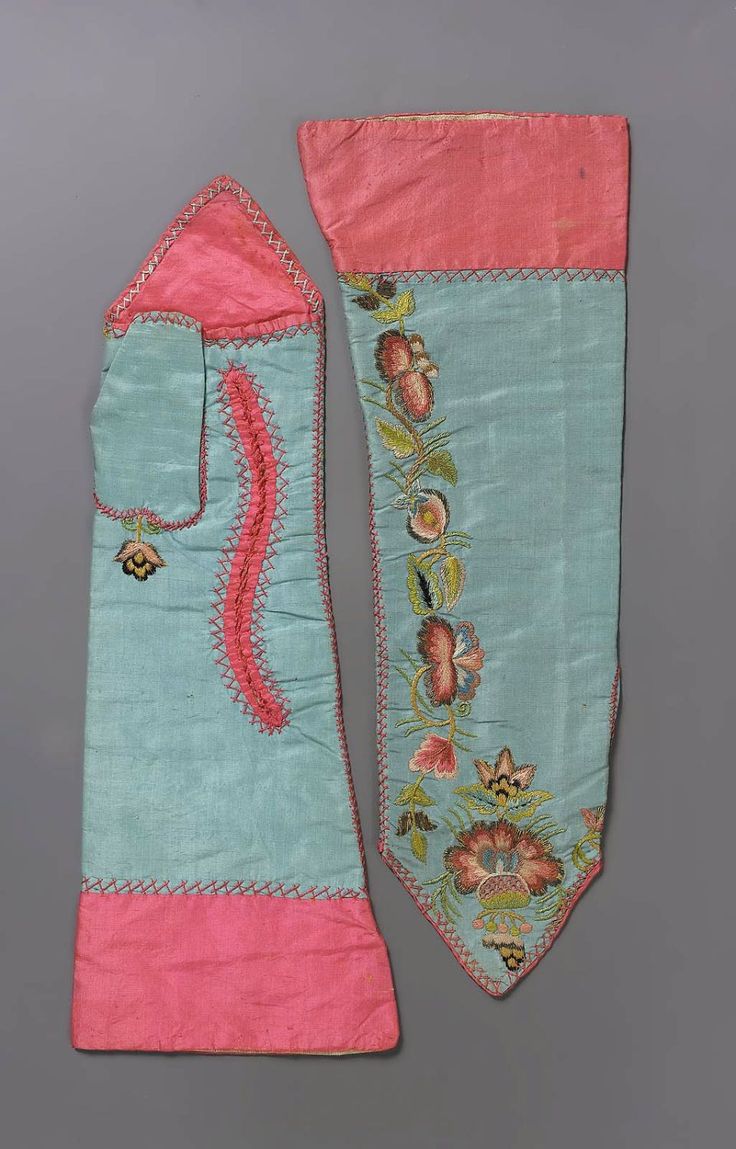
Pair of women’s mitts, probably Italian, 18th century. Blue silk trimmed with bright pink silk and embroidered with flowers, MFA Boston
So, if you ever want to do early 18th century Barbie, the colour is 100% accurate!
To give your eyes a rest, lets look at a portrait with a pale pink dress, and then a palest pink pair of shoes:

Madame Anna Potocki Palatine de Chiovie (Anna Leszczyńska (1699-1717) by Johan Starbus 1712

Michael Dahl I, The Honourable Mary Mansel, Mrs John Ivory Talbot; National Trust, Lacock Abbey, Fox Talbot Museum and Village

Shoes, England, circa 1700-1715, silver lace, metal sequins, leather, silk satin, M.64.85.7a-b, LACMA
And muted rose pink. I absolutely adore the gold green and pink bizarre silk of Elisabeth-Charlotte’s gown:

Workshop of Pierre Gobert (1662–1744), Elisabeth-Charlotte d’Orléans, Duchess of Lorraine, c 1710
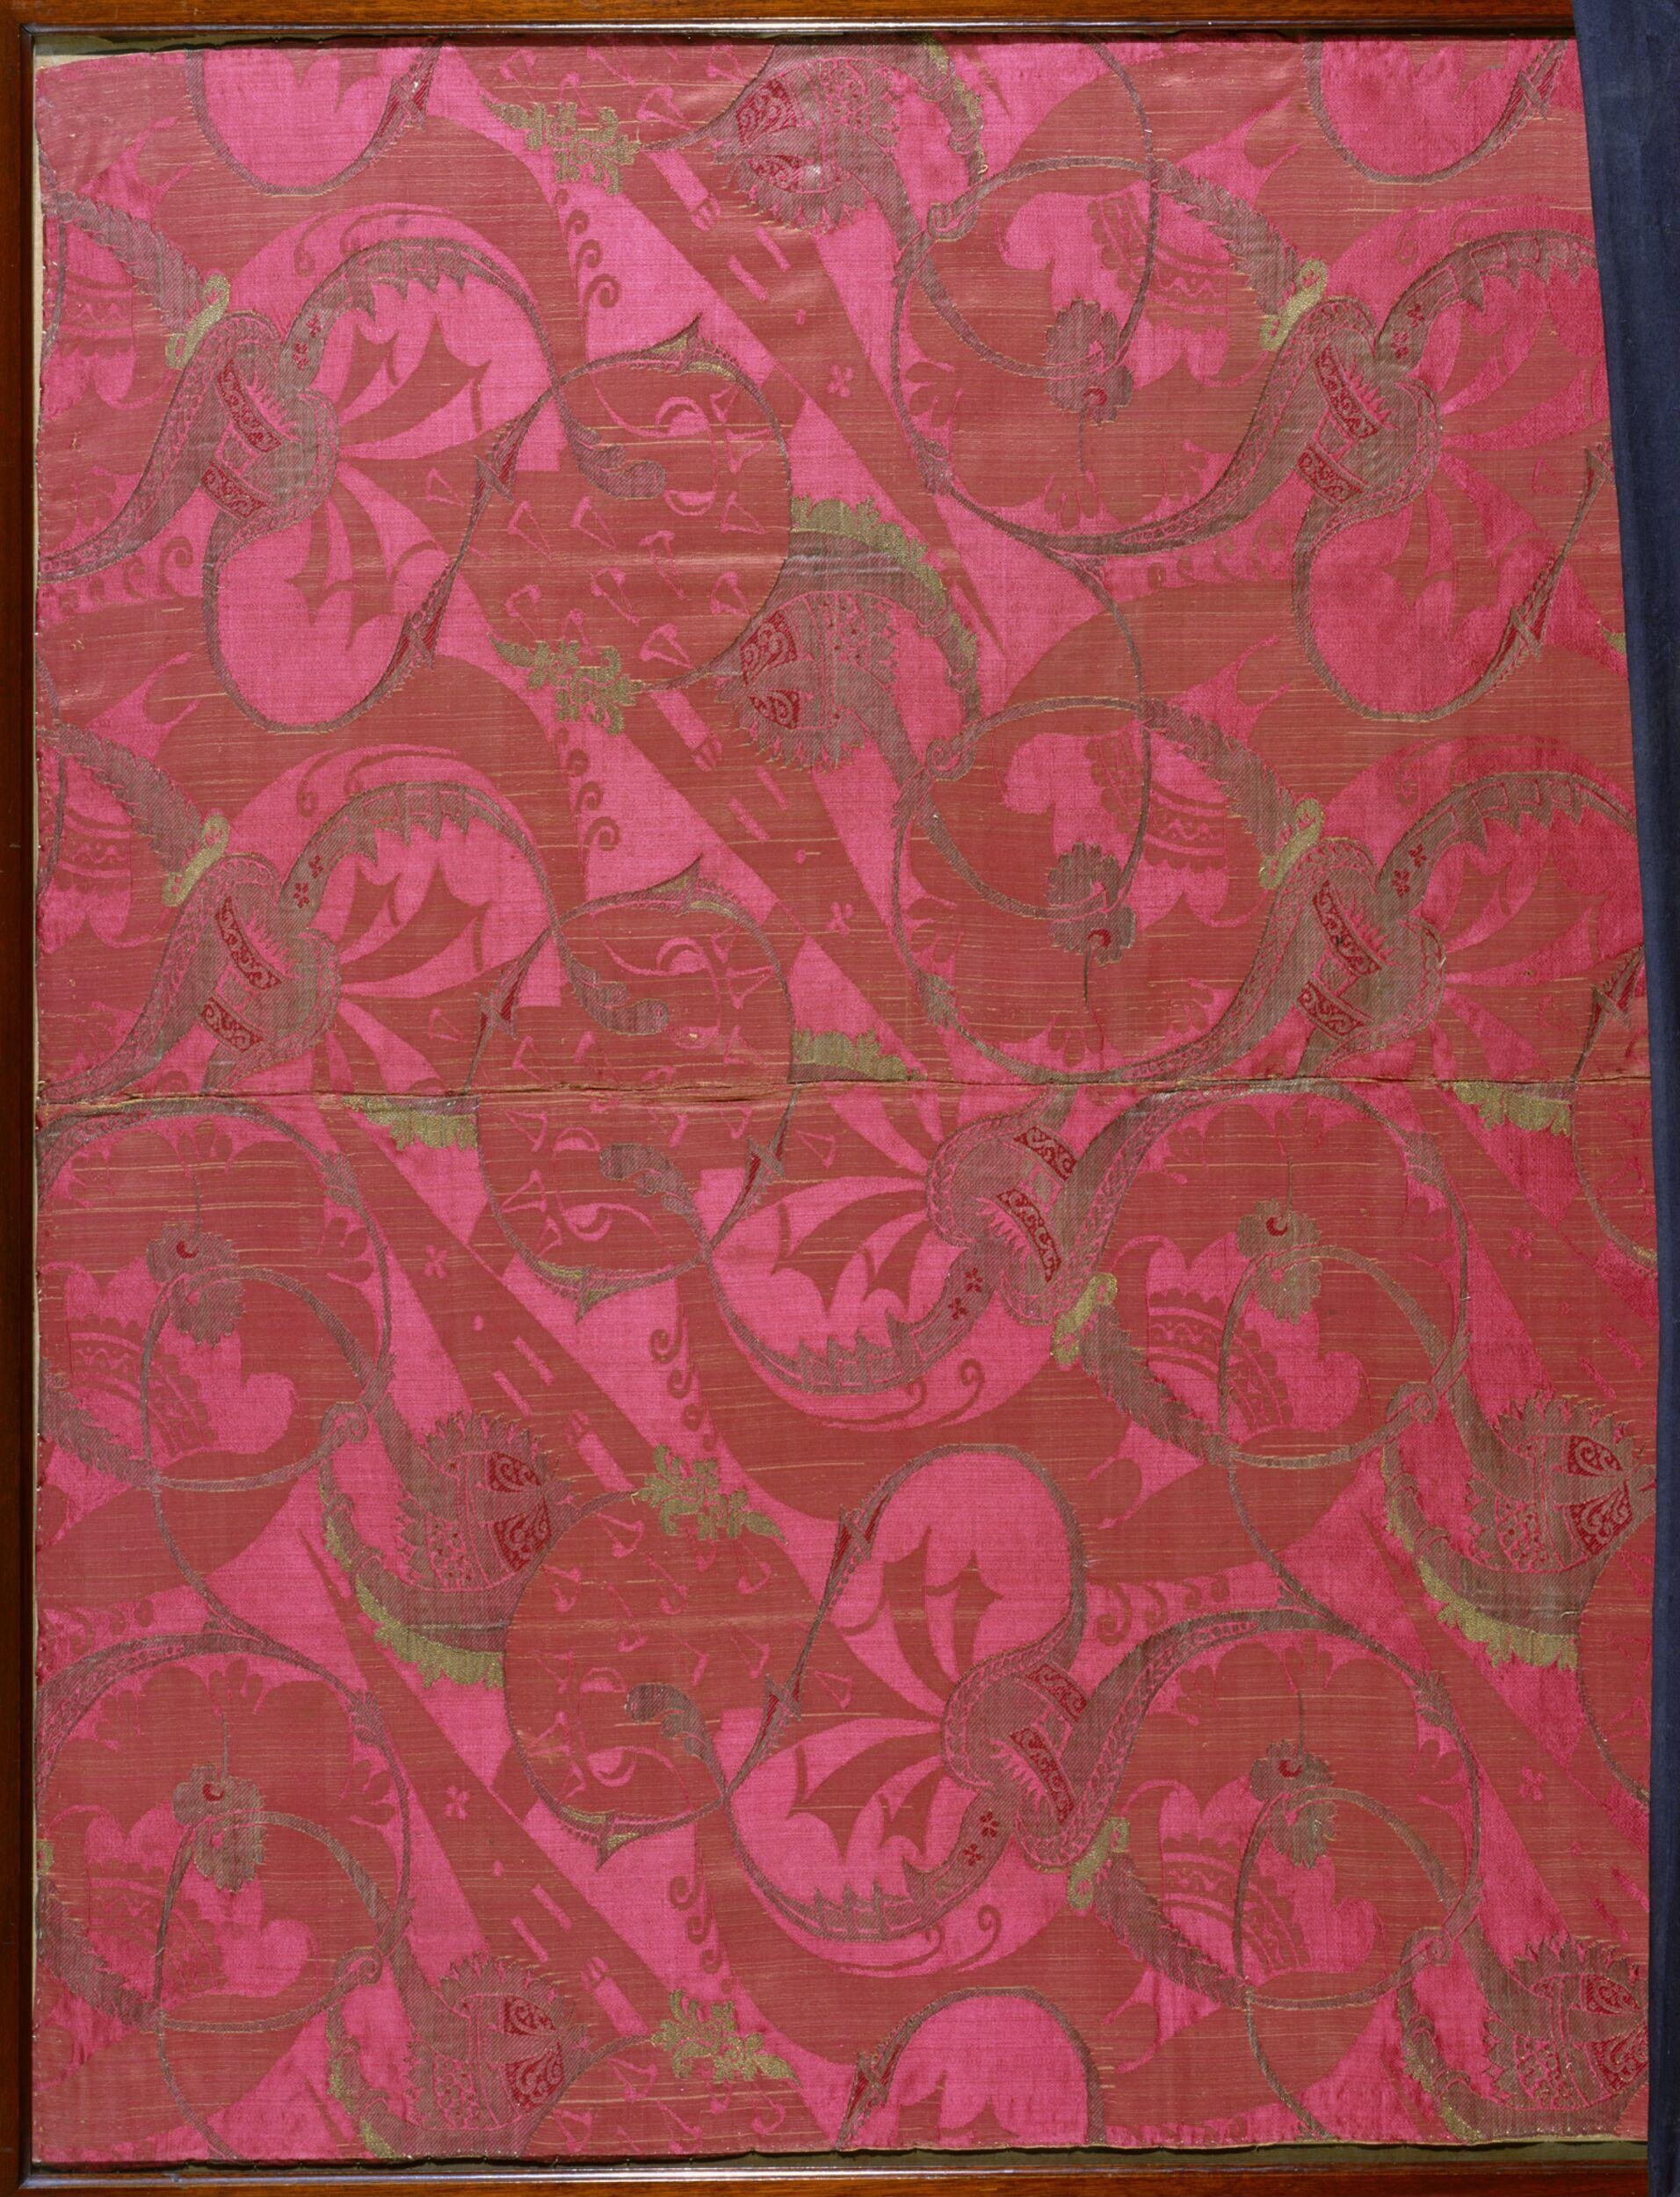
And this length of silver and multicoloured, including peach pink, bizarre silk:
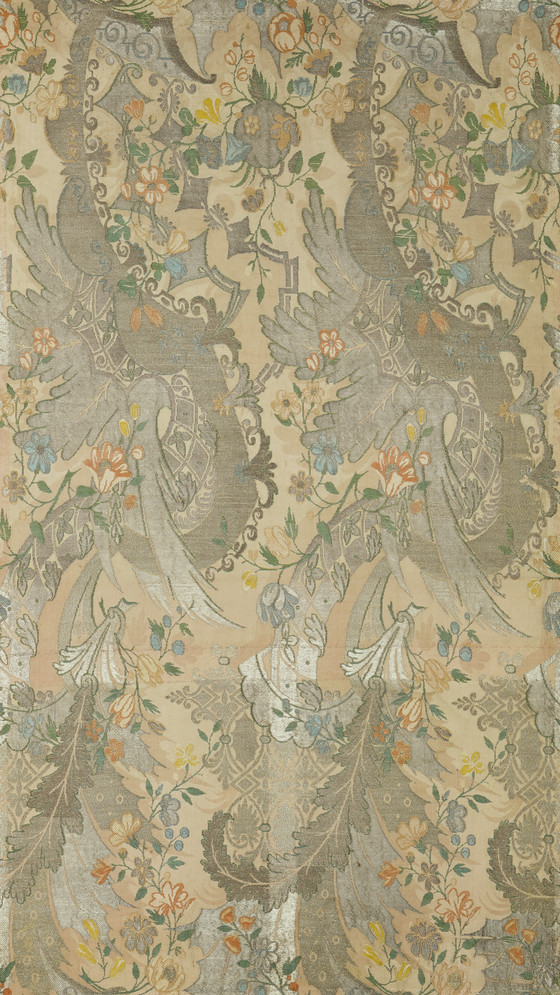
Fabric, Italy, Venice, 1712-1731, Silk damask with silk and metallic thread supplementary-weft patterning bound in twill, LACMA M.67.87.
Here are a couple more items that have pinks that are closer to Elisabeth-Charlotte’s

Gaming purse, 1690–1710, French, silk-linen Brooklyn Museum Costume Collection at The Metropolitan Museum of Art 2009.300.2075
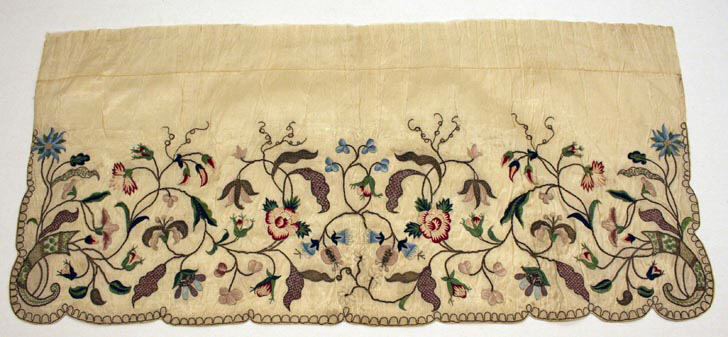
Apron, early 18th century, British, silk, metal, Purchase, Irene Lewisohn Bequest, 1960 Metropolitan Museum of Art, C.I.60.26.4
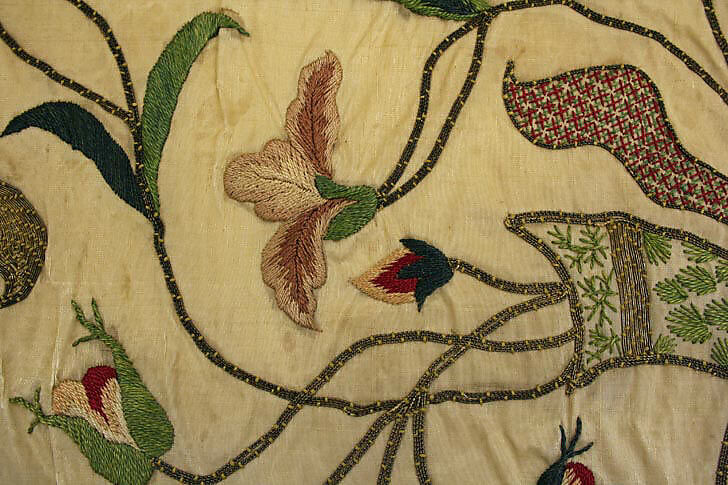
Apron, early 18th century, British, silk, metal, Purchase, Irene Lewisohn Bequest, 1960 Metropolitan Museum of Art, C.I.60.26.4
I also adore Polish noblewoman Emercjanna’s smart riding habit with waistcoat of bizarre silk, all topped with a crisp pink bow with pinked edges:

Portrait of Emercjanna Pociej née Warszycka Attributed to Ádám Mányoki, 1719-20
Speaking of pinking, the ribbon on these gloves is pinked pink:

Pair of gloves, Italian, 18th century, Milan, Italy, bobbin lace, Museum of Fine Arts Boston, 38.1274a-b
As the only other similar lace gloves I am aware of are dated to the 2nd half of the 17th century, it’s plausible this pair is early 18th century. It’s entirely possible the silk ribbon has been replaced, as using fully pinked fabric as a ribbon is quite unusual.
Just in case, here’s another extant example of that pink:

Stomacher, 1700-1730, Cream linen embroidered with coloured silks, Manchester Art Gallery, 1957_455
We could call this stomacher the pinkest pink, as the central flower is a clove pink, better known as a carnation. Carnations, and the entire dianthus family are known as pinks. They their name to the colour pink, and either gave their name to or took their name from the scalloped or zig-zag edge finish known as pinking (like the ribbon above), due to the zig-zagged edges of their petals.
Here’s a young boy in a shade that really is exactly what you think of when you think pink: This post was written by Leimomi Oakes for thedreamstress.com. If it is published somewhere else it has been stolen.

Geoffrey Kneller, The Chandos Family, 1713
And on a young woman, beautifully accented with silver (the portrait is probably 15 years earlier than the date given, but we’ll leave it for now)

Portrait of a lady in a pink embroidered dress Circle of Nicolas de Largillière (1656–1746), ca 1715
And on an older woman. Pink for all ages!

Anton Paulsen, Barbara Lutken, Hamburger Kunsthalle 1710s
And some pink-trimmed accessories to go with their pinks:

Pair of infant’s mitts, Italian, 18th century, Museum of Fine Arts Boston, 38.1244a-b

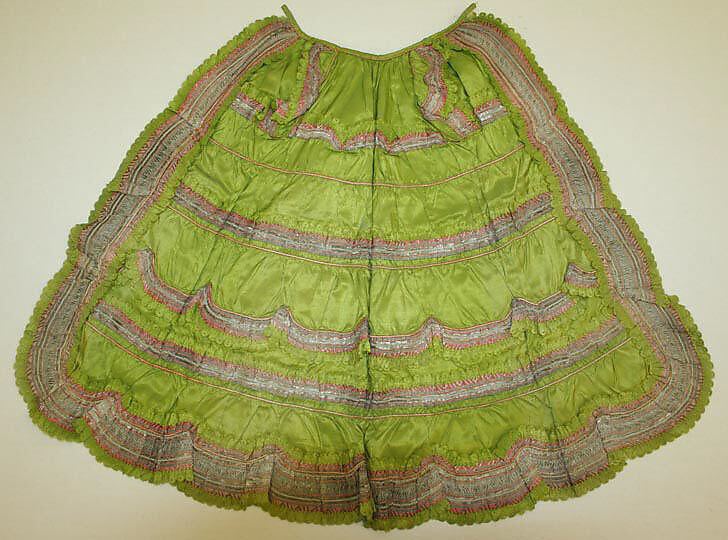
Shoes & Pattens, 1710-1730, Pattens made from green brocade lined cream wool. Ribbon replaced May 1963, Manchester Art Gallery, 1947_1056
Apron, 18th century, European Medium- silk, Purchase, Irene Lewisohn Bequest, 1971, Metropolitan Museum of Art, 1971.242.6
There’s no specific date given for this apron, but the vertical pocket slits are consistent with late 17th and early 18th century fashions.

Apron, 18th century, European Medium- silk, Purchase, Irene Lewisohn Bequest, 1971, Metropolitan Museum of Art, 1971.242.6
Here’s another boy in classic pink:

Portrait of Charles Carroll of Annapolis (1702-1782) by Julius Engelhardt Kühn, 1712
And a waistcoat with two shades of pink, a light one like the suit above, and a dark rasberry hue:

Waistcoat 1710-30, silk, wool, linen, silver, https-::museumrotterdam.nl:collectie:item:71443
Numerous portraits of the young Louis XV show him in pink. This one I suspect is related to a specific ceremonial costume or order.

Jean Ranc, Portrait of Louis XV of France (1710-1774), 1718

Apron, American (New England) 18th century, Silk with silk and gold metal embroidery and silk ribbon, Museum of Fine Arts, Boston, 46.312

Brocade fragment, French, 18th century MFA Boston, 96.397
Moving on to another Louis X portrait, this one has him in salmon satin:

Pierre Gobert, Louis XV as child, Fundación Jakober 1712
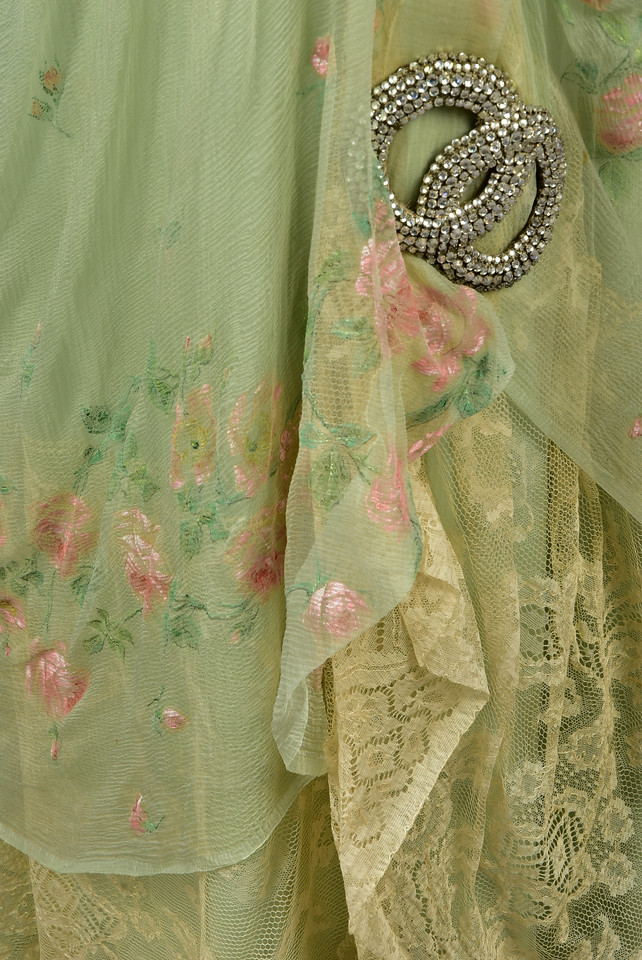
And here’s an apron with both the rose of his older portrait, and the salmon of his baby look:

Apron, probably French, 18th century Silk figured weave with silk and silver metal embroidery, MFA Boston 41.538
There are salmon and pink shades galore in this portrait:

Portrait of a woman, possibly Marie Louise Élisabeth d’Orléans (1695-1719), wife of Charles of France, Duke of Berry (1686-1714), Pierre Gobert 1713
And here’s some silk from the same era with brocaded flowers in a range of salmon hues.

Textile, England, Spitalfields, Early 18th century, Silk satin with silk supplementary-weft patterning LACMA M.82.5
More orange-y pinks appear in these portraits:

Rosalba Carriera – Self-Portrait Holding a Portrait of Her Sister, 1715, Uffizi Gallery

Johan Starbus, Anna Leszczynska, 1712
And on this striking bodice:

Bodice, early 18th century
And these sweet knitted mitts:

Mitt, Italian, 18th century, silk, Museum of Fine Arts Boston, 38.1234
And Salmon verges on deep rose in these portraits:

Jean-Ranc, Portrait of Renee Tranchant du Trait as Diane, 1714

Attributed to Godfrey Kneller (1646–1723), Josiah Bacon, ca 1710
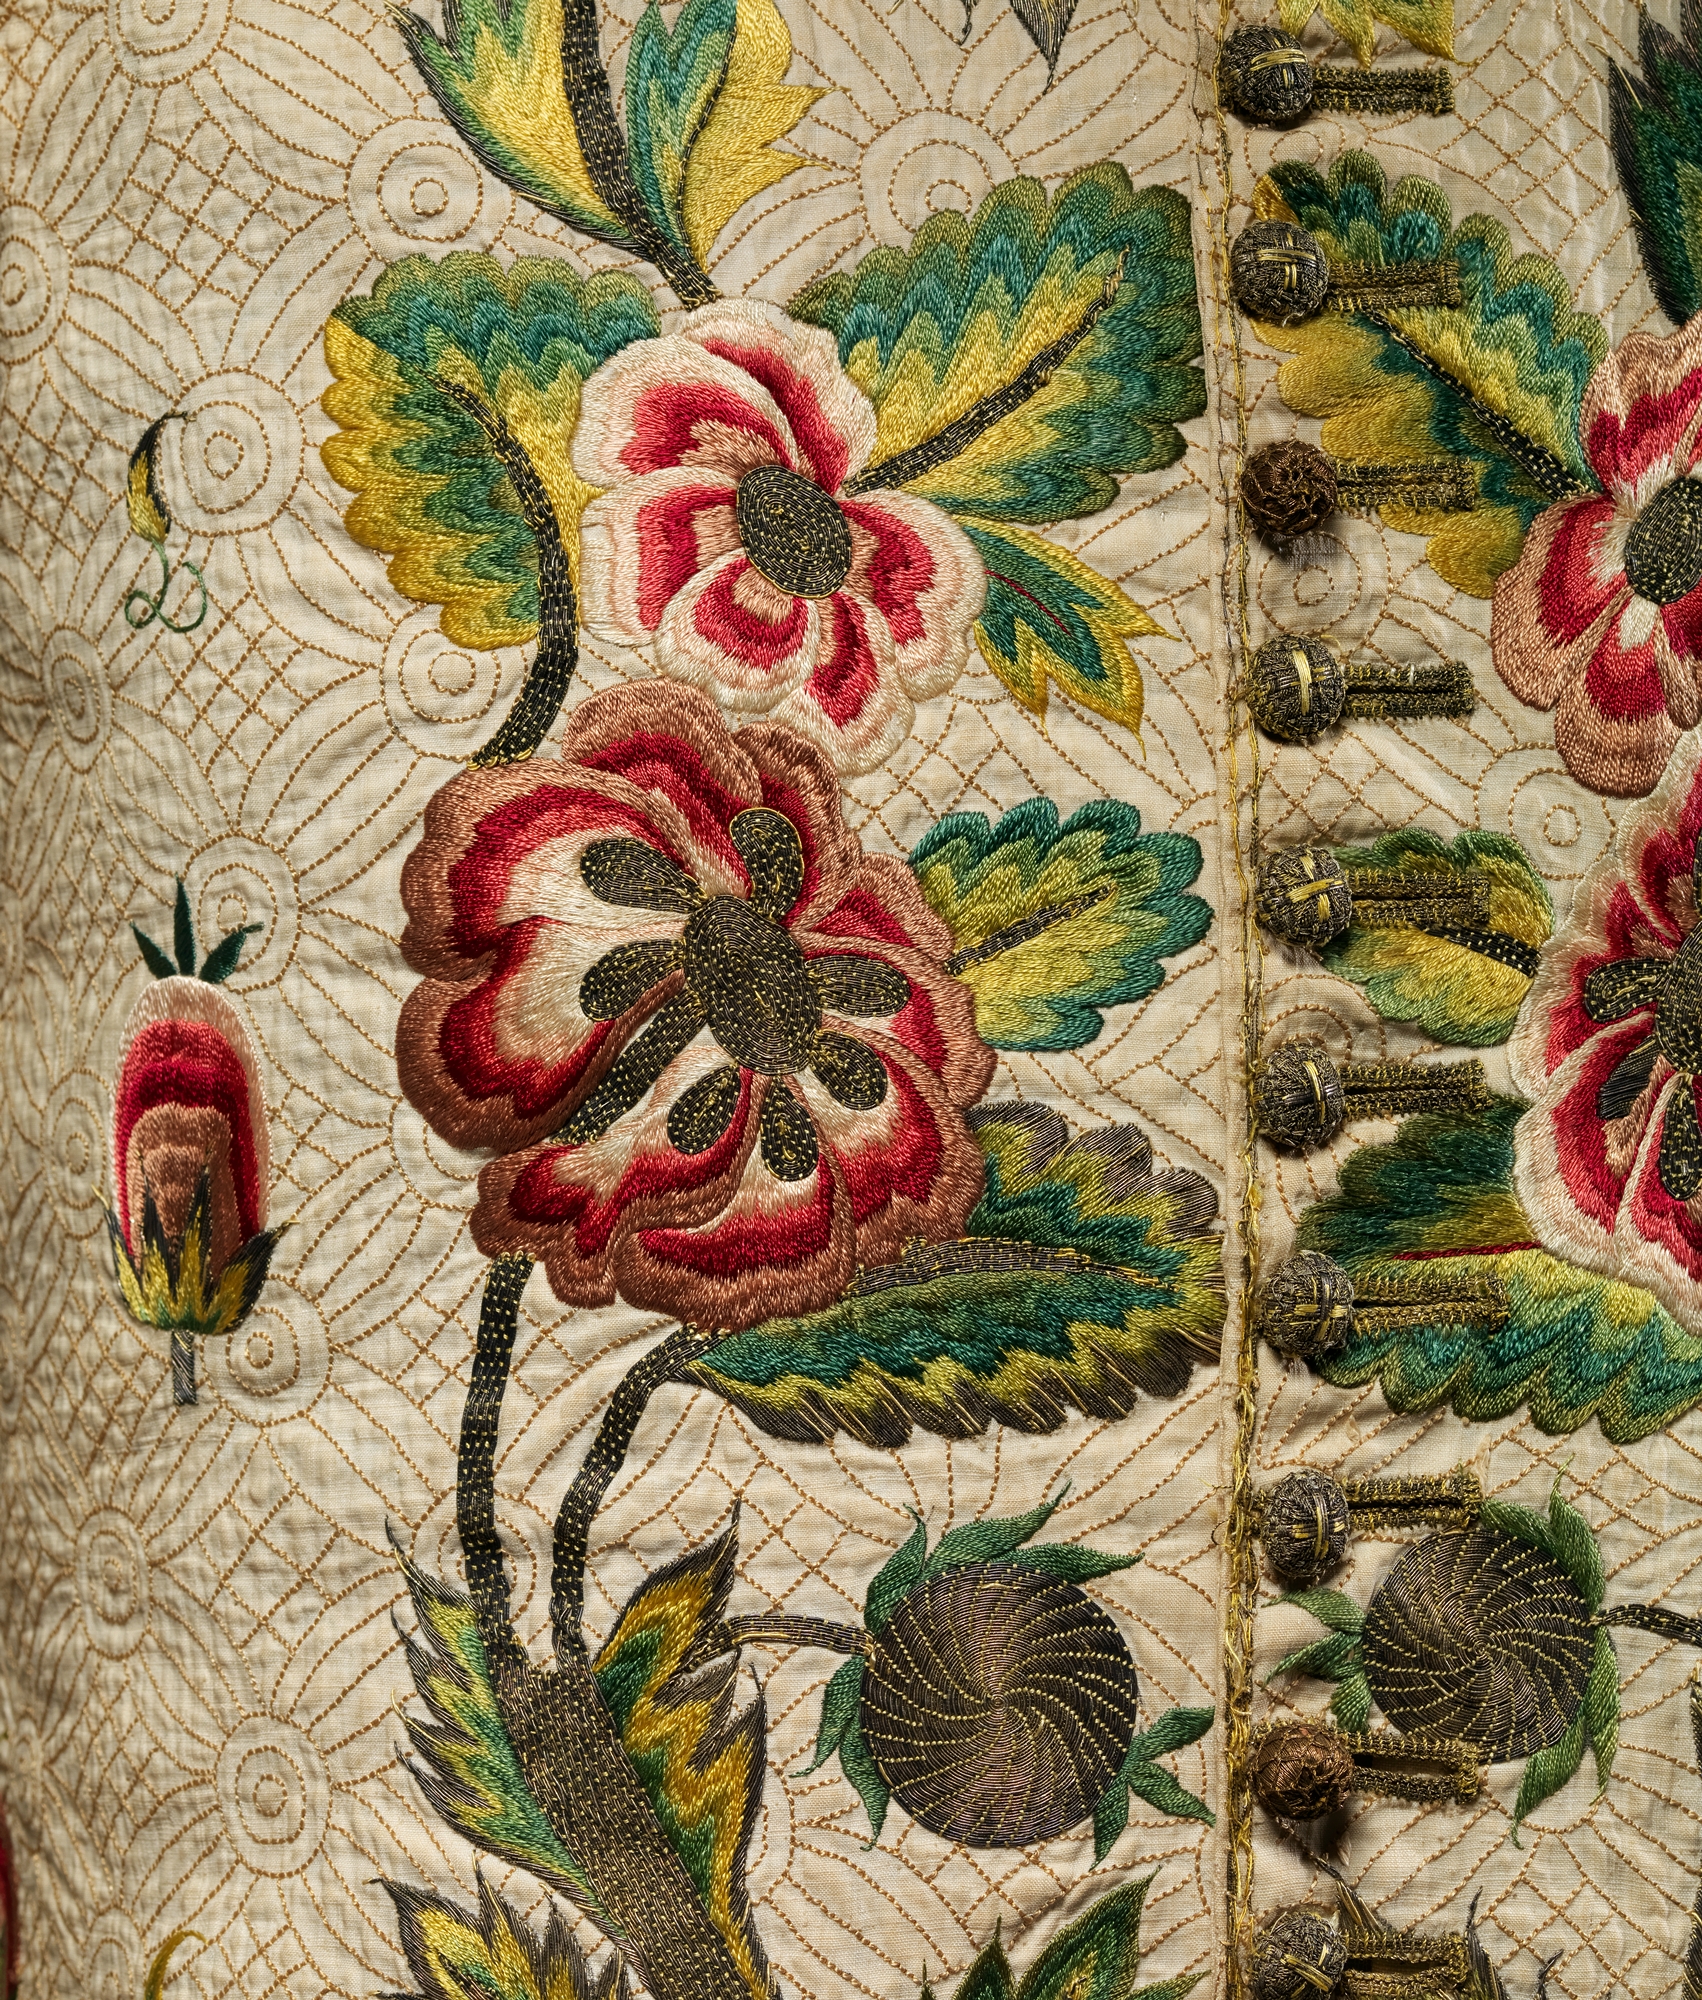
And salmon and deep rose, along with red, becomes roses on this waistcoat:

Waistcoat, early 18th century, British, linen, silk, metallic thread, Metropolitan Museum of Art, 45.49
Waistcoat, early 18th century, British, linen, silk, metallic thread, Metropolitan Museum of Art, 45.49

Marie-Anne de Chateauneuf after Nicolas de Largilliere, 1712

Mme. Titon de Cogny Nicolas de Largillière 1713

Apron (France), early 18th century, silk with silk embroidery, Cooper Hewitt Design Museum 18386995
Look at these glorious rose shades:

Hyacinthe Rigaud, Portrait de Madame de La Vieuville, comtesse de Parabère 1711-12

Portrait of a woman with a medallion, Attributed to Alexis-Simon Belle ca 1717

Lancelot Volders, Marie Louise of Hesse-Kassel with her sisters-in-law 1709

Stomacher, 1700-1720, Cream satin over canvas, embroidered in coloured silks, backed with cream silk., Manchester Art Gallery 1955_174
The colours in this portrait seem a little over-saturated and yellow tinted, so I suspect the actual colour is more like the waistcoat pocket below.

Portrait of an unknown Lady , misidentified with Adrienne Lecouvreur (1692-1730). Attributed to Alexis Simon Belle ca 1710
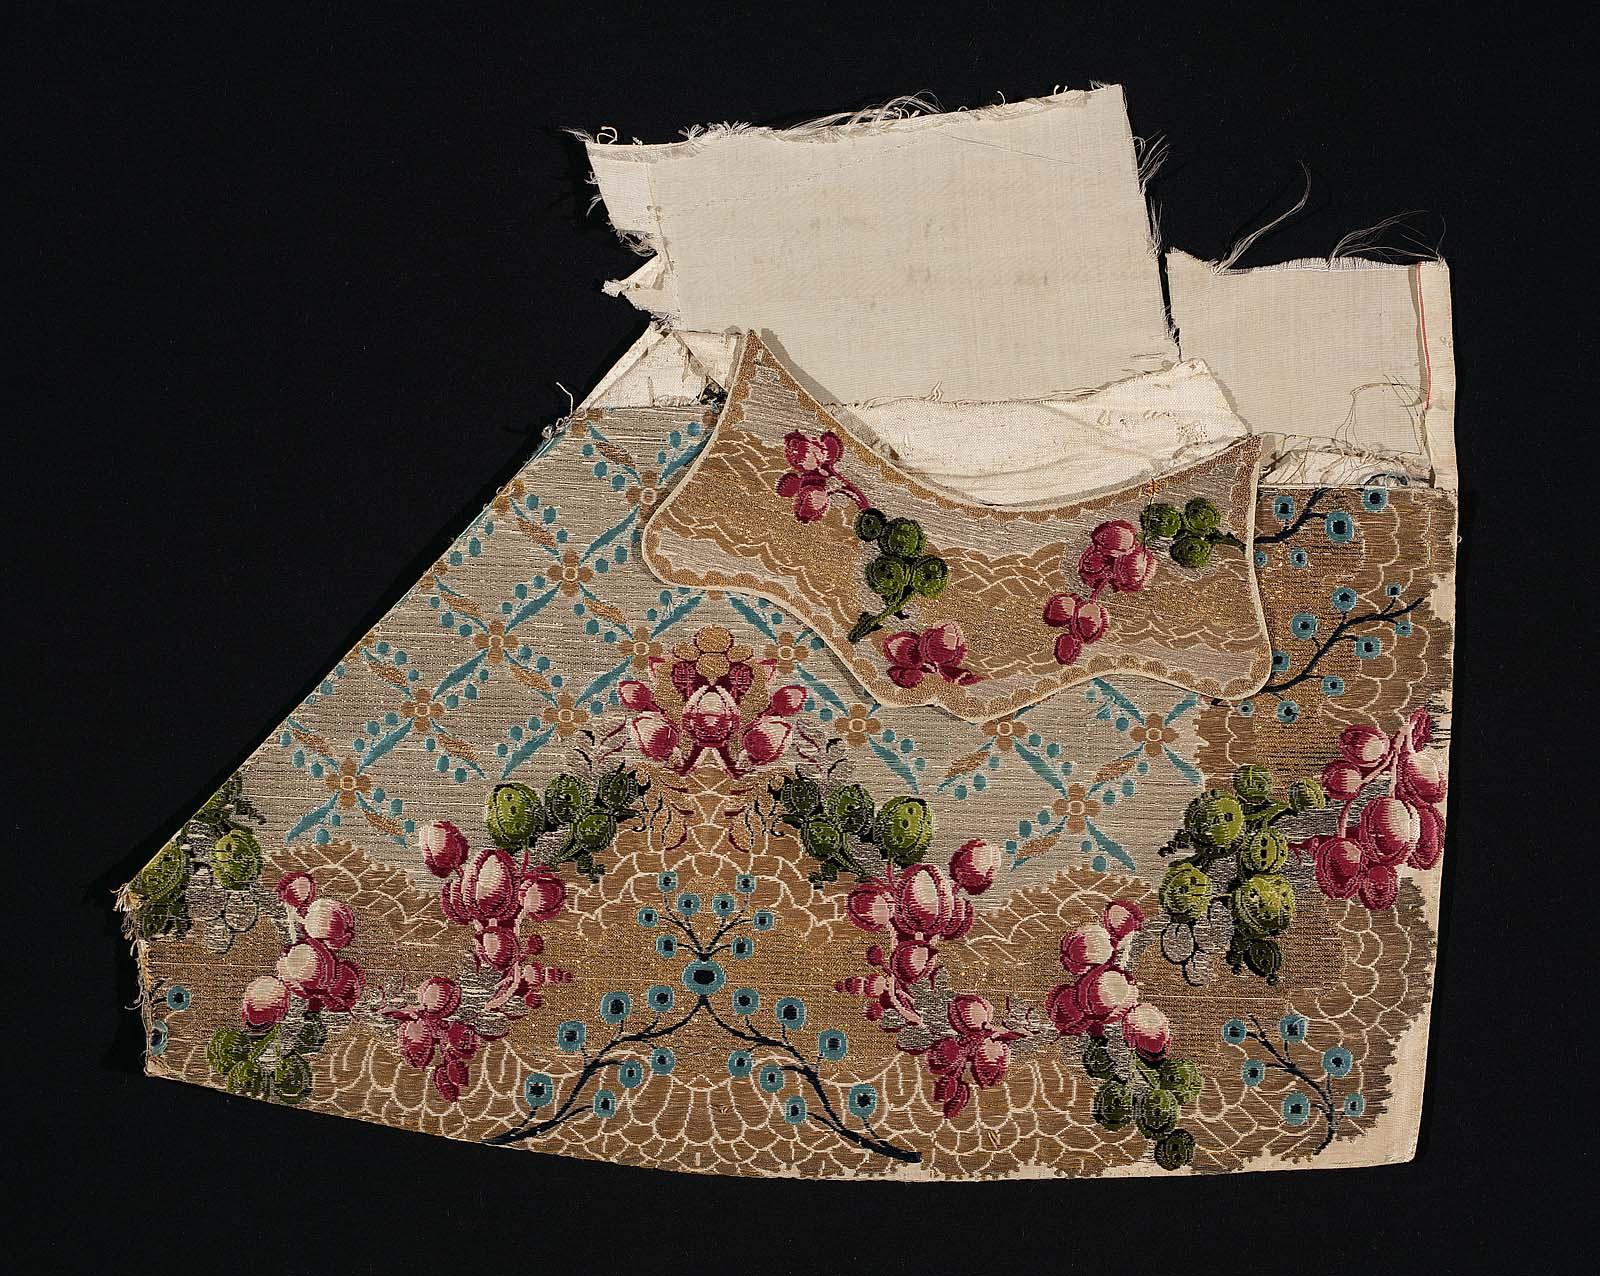
Right front skirt of man’s waistcoat, First half of the 18th c, MFA Boston, 41.890

Frans van Stampart (1675–1750) wikidata-Q5493032 Title Portrait of Anton III. Graf von Montfort (1670-1733), 1709 Salzburg Museum
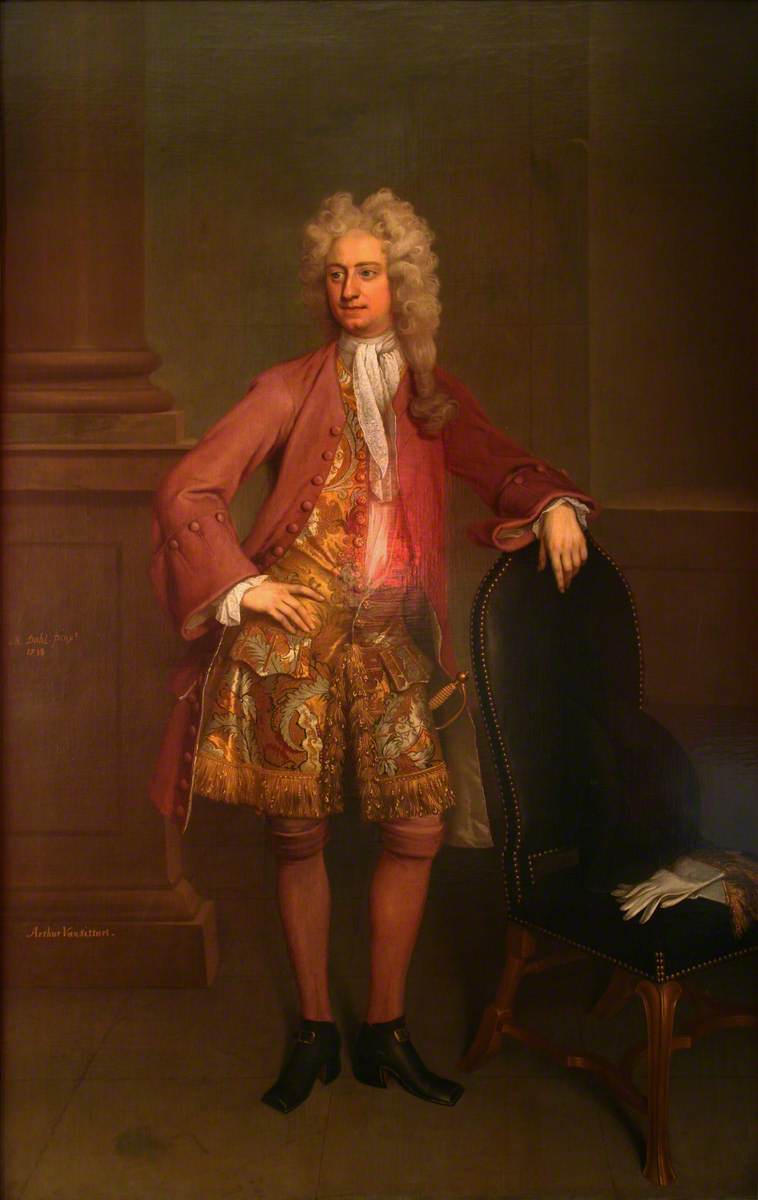
Michael Dahl I, Portrait of Arthur Vansittart (1691-1760); 1718, National Trust, Lyme Park; http://www.artuk.org/artworks/arthur-vansittart-16911760-132554
Dress fabric of brocaded silk damask in silver-gilt thread, Italy, ca. 1700 VAM
Finally, to finish I’ll continue my tradition of finding an incredibly cute kid portrait with pink for the decade.
Here we have something you can throw on the Barbie. A baby princess dressed as a shrimp:

Portrait of a Young Princess Lorraine, Presumably a daughter of Leopold, Duke of Lorraine, possibly Marie Gabrièle, (1702-1711), Josepha Gabrièle (1705-1708), Gabrièle Louis (1706-1710), Elisabeth Therese (1711-1741) or Anne Charlotte (1714-1773). Most likely Anne Charlotte based on a painting of Elisabeth Therese that may be a companion to this. Painting possibly by Pierre Gobert.
This post was written by Leimomi Oakes for thedreamstress.com. If it is published somewhere else it has been stolen.